by tmoffett | Dec 9, 2010 | Landscape, Photographic Technique, Photoshop tips

John Day Fossil Beds, Painted Hills
On our way back to Idaho from the Oregon Coast last summer, we stopped at the John Day Fossil Beds Painted Hills Unit. We had never been there before, and thought it might be a good rest stop. We arrived about an hour and a half before sunset, just as the light was starting to get good. We were not disappointed in what we saw. It was the perfect place to shoot panoramics. Up to this point, I really had not done much as far as shooting multiple images and stitching them together into a panoramic view. I decided to try that technique here. The image above is created from nine individual images stitched together in Photoshop. While I don’t use this technique very often, it is useful in some situations and is fun to try occasionally.
While Photoshop makes it quite easy to stitch images together, there are a few things to keep in mind to in order to get better results. First, anything in motion will make it more of a challenge. This applies to clouds, water or even foliage that is blowing in the wind. Second, the foreground is easily distorted, so be careful what you place there. Third, While Photoshop does a fairly good job of stitching the images together, carefully check and double check the seams! Some cleanup with the clone stamp or healing brush is nearly always necessary. Paying attention to these three point will greatly improve your results.
by tmoffett | Apr 18, 2007 | Photoshop tips
Things have been pretty crazy around here lately. I have a show that hangs on May 1st that I am frantically trying to get ready for. I have also been working on two wedding albums, shooting portrait sessions, marketing stuff, and the list goes on and on. I will post more images shortly as I get caught up a bit, but for today I wanted to pass on a little Photoshop tip.
Have you ever wanted to put a vignette on an image, but when you do the vignette you get banding in the image? If you have, here is a technique that works really well, and I have never had the banding problem with it. The key is in how you feather the selection.
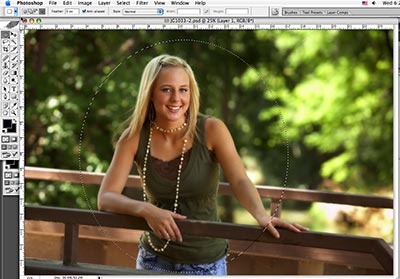
Open an image and with the marquee tool make a hard edged selection. To make this selection make sure that feathering is set to 0 pixels.
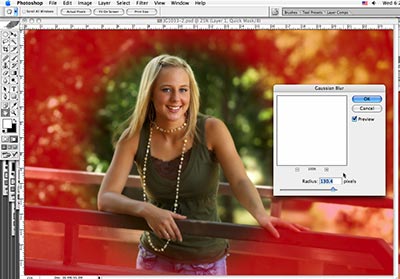
Enter Quick Mask mode by pressing the “Q” key, then do a Gaussian Blur. This way, instead of guessing how much feather to use you can visually see what the feathering will look like. On a high resolution file I typically use a setting of 120-150 pixels. If the feathering goes too far, you can then “Clean up” the mask with the brush tool.
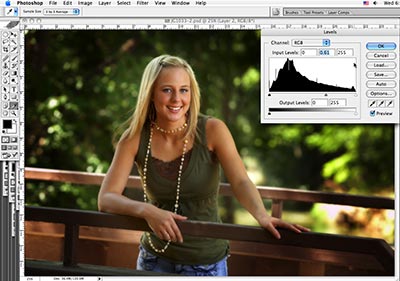
Exit Quick Mask by again pressing Q. Invert the selection, copy to a new layer(Cmd-J / Ctrl-J), then choose Image>Adjustments>Levels and drag the midpoint slider to the right to get the desired effect.
Here is a before and after to show the result. This technique works well anytime you need a feathered selection and don’t know for sure the amount of feathering needed.
Before: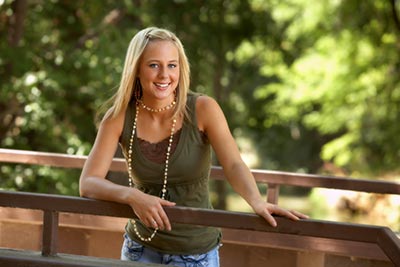
|
After:

|
The changes on this particular image are subtle, but the technique can drastically change the feel of many images.
Recent Comments