by tmoffett | Jan 24, 2011 | Color, Composition, Landscape, Photo tips
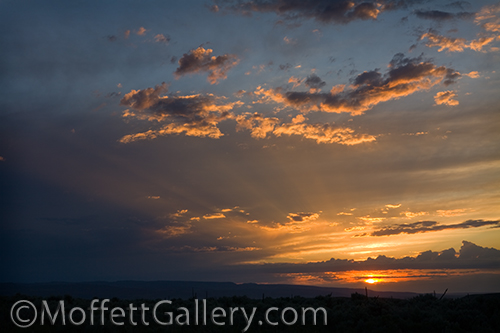
Sunset, Cassia County, Idaho
Sunsets are wonderful. Never the same, they provide so much opportunity to explore color and light. Some are subtle, filling the sky with pastels while others vibrant and deep. Nearly always, though, you will find at least some patches of blue that complement the reds and oranges that fill the sky, adding depth to an already beautiful scene.
While it seems that such incredible scenes are hard to go wrong with in photography, taking some time to carefully compose and think about the scene will greatly enhance your ability to capture it most impressively. Here are a few tips to photographing the sunset.
1. Use a tripod! This is a must for nearly any landscape photography. I use small apertures and low ISO settings to maximize depth of field and color saturation, and the result means a slow shutter speed. Hand-holding will ensure motion blur which is normally completely unacceptable.
2. Compose carefully. Using a tripod helps me to slow down and make sure that everything is near perfect. Level the horizon. Can you use the rule of thirds or is a symmetrical composition better? Check and recheck and then shoot.
3. Shoot a series of images as the sun sets. You might think you have the best image, break down and and move on only to realize that the color gets even better later. I love photographing after sunset. Often my best image is 10-20 minutes after the sun has completely disappeared over the horizon.
4. Bracket the exposure. Exposure is critical with sunsets. Over-expose and you lose saturation, under-expose and you get noise. You really need a perfect exposure in order to get a high quality print.
by tmoffett | Jan 18, 2011 | Black and White, Photo tips, Ramblings
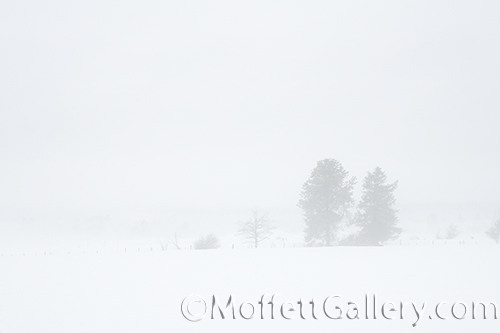
Stormy Afternoon, McCall, Idaho
I spent the extended weekend with Christeena in McCall celebrating our 21st anniversary. This was a much needed getaway! Stress had crept into our lives and getting away from it all for a few days always seems to do the trick to help us return to a more normal life. We had a wonderful time just relaxing, driving and photographing. We had stormy weather nearly the entire time, but that has never hampered my ability to have fun and make new photographs. After attending church on Sunday, we went for a drive to check out the scenery. We headed out in a direction we had never been and were not disappointed. It was raining a bit, and then the fog rolled in. It really was beautiful. I love the fog, at least photographing in it. Driving in it is a different story. I don’t get the opportunity to photograph foggy scenes very often, so I happily took advantage of this moment.
When photographing in the fog, proper exposure is critical. If you don’t adjust your exposure settings, then your image will end up dark and muddy looking. I like the light, airy feeling of the fog, so I shift my exposure a full 2 stops. This will push the image to the light side, but should not over-expose anything. Learning to use the exposure compensation settings on your camera will make making these corrections simple.
by tmoffett | Nov 19, 2010 | Color, Landscape, Photo tips
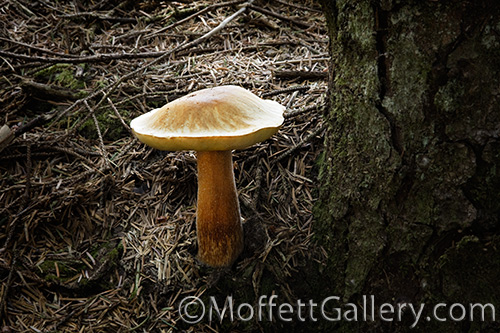
Mushroom
On an overcast afternoon last month I was strolling the 804 trail with my camera and photographing the ocean waves and the shoreline. It was a wonderful experience, as the tide was coming in and the waves raging from the unsettled weather. After some time, the sun decided to show itself and I decided that I was through photographing, as the high sun was way too harsh for my liking. On the way back to the hotel, I decided to step into the woods and look around. I found several interesting mushrooms growing, so I decided to photograph them.
While the light on the ocean at noon is not good, when getting back in the shade of the trees the light became soft and rich. It reflected off of the mushroom so soft and nice, it almost looked like it was glowing. I felt like I was on a treasure hunt, searching for mushrooms! I learned that they come in lots of varieties, some very interesting. It was also reinforced in my mind that the subject of a photograph can be just about anything. If the light is right, anything can look good. I keep telling my students that if they can find the light, then the subject will appear, they just have to be observant. If I could just get them to believe in themselves and in this philosophy they would start making interesting photographs.
by tmoffett | Nov 9, 2010 | Color, Photo tips, Photographic Philosophy
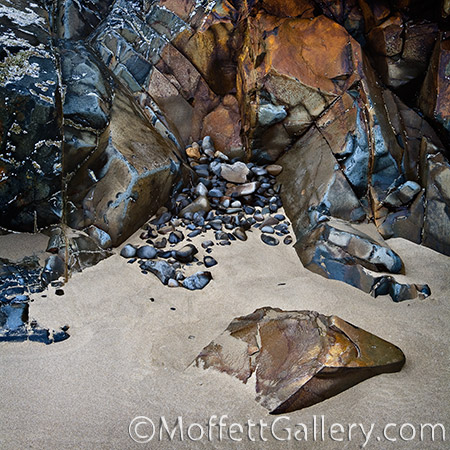
Sand and Stone
Overcast skies create a wonderful quality of light for photographing details. This image was shot between rainstorms on a recent trip to the Oregon Coast. The shadows are full of detail and the colors are rendered rich and vibrant.
Many times getting out in conditions that would seem less than ideal end up being the best days for photographing. I have learned that the best time to create images is the present. It matters not what the weather is, if I have an open mind and feel my environment, I will be successful. The key is feeling. Feeling the light. Feeling the moment. Feeling your surroundings. Internalizing those feeling and then capturing them visually is the process that makes successful images. Without the feeling, I am only able to find snapshots.
by tmoffett | Oct 12, 2010 | Color, Landscape, Photo tips
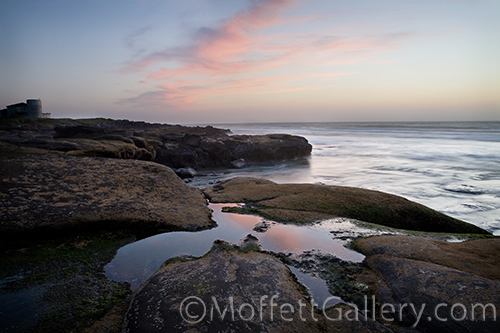
Sunset Reflection, Yachats, Oregon
Light. Photography is all about light. Not just intensity, but more importantly quality. Photography means painting with light. As photographers, not understanding light is like a painter who doesn’t understand paint! Unfortunately there are too many photographers without a basic understanding of their craft.
My absolute favorite time to photograph the landscape is the 30 minutes after sunset. Why? because of the quality of light that is prevalent at that time. The light is soft, warm and moody. There is a balance between light on the foreground and the light in the evening sky that is wonderful! There is still direction to the light, yet it is still very controllable. The light intensity falls off fast, so there is not a lot of working time, so you must be ready and not expect to get a lot of exposures in, but the ones that you do get are great ones. My goal when I go out to shoot is one image. I may set up my equipment and photograph the same scene multiple times until the light is completely gone. This way, I can see the progress of the light from sunset through the glow of afterlight. This image went from great to gone in less than five minutes. If I had not been ready, I would have missed it.
Some of my other favorite lighting conditions are overcast, especially for landscape photography, reflected light for both landscapes and portraits and open shade, particularly for portraits. Learning the characteristics of light is critical to your success as a photographer.
by tmoffett | Oct 10, 2010 | Color, Photo tips, Photographic Philosophy, Ramblings
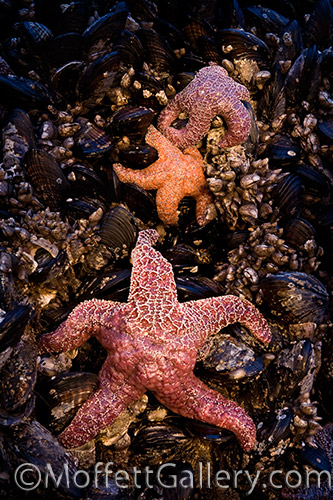
Starfish
While on the Oregon coast, low tide was an hour past sunset, so photographing at that time meant improvising lighting. I really dislike using flash as it is harsh and flat. My students all know how much I dislike it, as I don’t allow them to use it on camera. If I was going to photograph the tidepools, I needed an alternative source of light. I opted for a Mini Maglight which is a small flashlight that I carry with me in my truck all the time. This light would produce a warm light (extremely warm if you don’t correctly white balance!) in contrast to the very blue light from the nighttime sky.
After determining composition and setting up the camera, I carefully calculated exposure, and then used the trial and error method to fine tune it. I determined that about 90 seconds would be needed to illuminate the starfish. I set up, opened the shutter and began painting. At about 75 seconds a wave came from nowhere and forced me to retreat! This happens all to frequently on the ocean. You must be ready! When the wave came in, I had just finished painting the starfish and was working on the background area. Upon inspecting the image and the histogram on the cameras LCD monitor, I decided to leave it alone. I liked the dark surrounding and the cooler tones around the fish. It added a little bit more depth to the image. Success!
Students often tell me that it is too dark to photograph. Not true! You just have to look at alternate methods of lighting your images. Often, these alternative methods will produce much more interesting results than shooting when it is light outside. We must, as artists, be creative not only with our vision, but also with our technique. Learning technique so well that it becomes a part of us is so important. With technique under control, we are then able to concentrate on our vision, how we see and present our vision to others. That is when we truly become artists!


Recent Comments