by tmoffett | Jul 26, 2012 | Black and White, Composition, Landscape, Photographic Philosophy, Photographic Technique
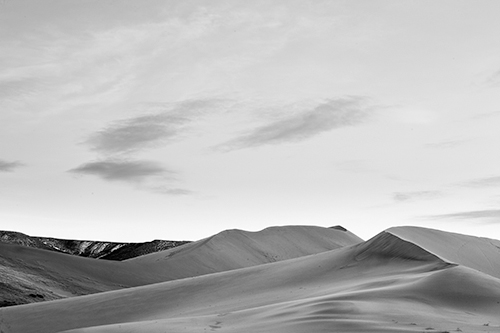
Bruneau Dunes
I was visiting with another photographer one day and we were talking about quality of light. I rise early and stay up late to photograph during the sweet light hours. This other photographer mentioned that you need the sweet light for color photography, but then switch to black and white during mid-day. I was very surprised to hear him say that and I one hundred percent disagree with him. Light quality is just that, quality. It really does not matter if you are shooting color or black and white. If you want quality light, you must work when the light is good. I have always taught my students that if you learn to shoot black and white, your color work will be much better, due to the fact that you must learn to see tones. Good tonal separation happens when the light is good. That is just another reason to photograph early and late.
The image above was made just as the sun was setting at Bruneau Dunes. The low sun is what is creating the highlight and shadows that sculpt the shape of the dunes. There is also balance between the dunes and the sky. None of this would have happened earlier in the day. For great landscape photography it is a must to photograph during the sweet light, otherwise you are just taking snapshots.
With the advent of digital photography, black and white photography is becoming a lost art. So many photographers just shoot a thousand images and then play with them on the computer to see what will look good as a monochrome image. It used to be, back in the days of film, that you would have to learn to see in black and white. We used filters to shift tones when we exposed the film, and then made additional adjustments in the development and printing stages to get the previsualized image on paper. Now we apply filters after the fact, and we get to watch the development in our “digital darkroom”… computer. It still seems so backward to me. Maybe I am just old school, but I believe that thinking before we press the shutter, like we used to do, will make us better photographers. Thinking more and shooting less is much more effective than the alternative. It will help put art back into our photographs.
by tmoffett | Jul 19, 2012 | Black and White, Color, Composition, Photographic Technique
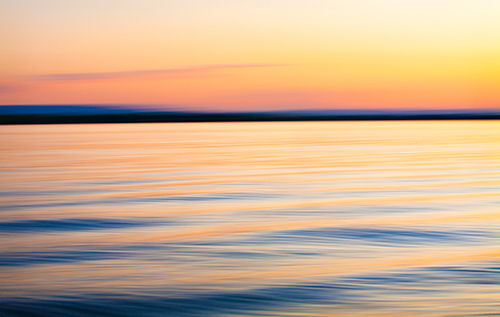
Complementary Reflections
It seems kind of strange to me to be talking about color. My photographic roots are in black and white. Before digital came into play, all of my personal work was black and white. I wouldn’t even carry color film with me. I loved what I could do with black and white. The entire process from shooting to processing to printing was fascinating to me. Expanding or compacting the tonal range of a scene and moving the tones to where I thought they should be was what I loved. I felt in complete control of the scene I was photographing. Then came digital.
The changes that digital brought along have been significant to me. I won’t go into them all now, that is for another time. The one change that I will discuss, though, is how it has affected my use of color. I still like to print in black and white, but I have added color as well to my repertoire.
Photographing in color first, and then converting the image to black and white, I began noticing how color could affect an image. I began studying the color composition of each of my photographs before converting them to black and white, and soon I began looking at the color in a scene and analyzing it before pressing the shutter. Little by little, color photographs began appearing in my portfolio. Now, it seems, that only those very special images make it to black and white.
The image above, Complementary Reflections, is one where color is everything. Without the color, the photograph would be a complete failure. The cool tones of the eastern sky reflecting in the water filled with the warm colors from the setting sun creates a feeling of excitement in the image that draws me in. When making this photograph, I got an idea to do a series of abstract images about color. Most of the photographs in the series so far I have made at the ocean, but occasionally I find just the right conditions on a lake or other body of water to photograph this way. It is fun and exciting to evolve and change. This change, to photograph in color, never would have happened for me if I had resisted the move to digital capture. It has been challenging at times, but always exciting!
This photograph also appears in my book Silent Solitude.
by tmoffett | Jun 11, 2012 | Black and White, Landscape, Photographic Technique
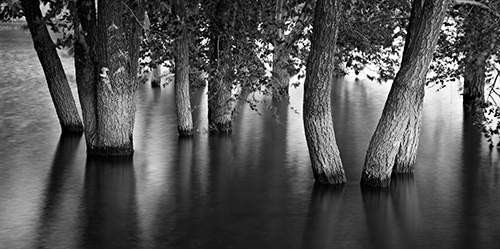
High Water Reflection, Lake Lowell
I just received my new Canon 5D Mark III and had time to go out and test shoot at the lake. I wasn’t really expecting great images, as I wanted to run some tests before using it for a “real” shoot. After looking at the files, I must say that I am quite impressed. Canon has done some great things with this camera.
I have always shot at 100 ISO to keep noise to a minimum, but after shooting a few images after sunset at higher ISO’s, I would not hesitate to use ISO 800 for fine art images. I even had to look hard to find noise at 1600. For sporting events where a little but of noise is acceptable, I would not hesitate to shoot at 25600. The noise structure at higher ISO settings was quite remarkable.
Previous to this camera I have never used auto focus, but after trying out the 61 point auto focus system, I think I might become converted! The ease of changing focus points makes it almost a no-brainer. There are occasions, however, that there is not a focus point far enough off center so that I will have to focus manually. When photographing the landscape on a tripod, for me this does not present much of a problem.
One feature that I really like is the electronic level. I found it to be very accurate and speeds up the framing process. I was composing one image that I was sure I had level, but when checking the electronic level, found that my eye was way off. I photographed both ways, and upon further inspection, found the camera’s level to be correct.
I have not put the camera through a test of all functions yet, but for what I have done, I know that I am going to like it. I can’t wait to get out later this week and continue working with this new tool.
The image posted was made on a windy evening at Lake Lowell at a location that I have photographed many times, but never quite like this. It always amazes me that there is something new to find each time I return to a familiar place. I somehow never tire of this place. Maybe it is that I never tire of photography and am always looking for something new. Training ourselves to see is such an important part of being a photographer. It is not so much training, but becoming aware of our surroundings and seeing life as it unfolds. As we become sensitive to our environment, then the images seem to reveal themselves. It is a wonderful experience to be a part of.
by tmoffett | Mar 19, 2012 | Black and White, Landscape, Photographic Philosophy, Photographic Technique
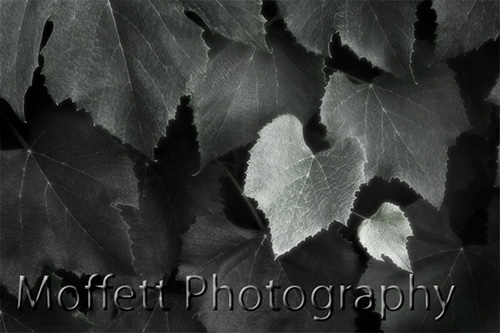
Grape Leaves
One of the most frequently asked questions by students in my classroom while working on photographs in Photoshop is, “What should I do to this image?” Nearly always my reply is the same. “What did you see and feel when you photographed it?” This concept of visualizing the end result before pressing the shutter button on the camera is becoming a lost art, yet is so important to achieving consistent, meaningful and powerful results.
I began to understand the idea of previsualization while studying Ansel Adams zone system under the tutelage of Craig Law at Utah State University. When making exposures using the zone system, a photographer must first know what he/she wants because the exposure settings (aperture and shutter speed) and film development process is determined by what the finished print is to look like. The whole process is very calculated. One must slow down and think about the image that is about to be created. Some may claim that this attention paid to the technical details takes away from the spontaneous art of photography. I differ with this way of thinking. Slowing down, really looking and taking in a scene allows me the opportunity to feel my surroundings. I am able to focus on my emotions. What is it that caught my attention in the first place? Why do I feel I need to make a photograph? What do I really see? What emotion do I want to elicit in the viewer of the image I am about to make? These are just some of the questions that I ask myself while setting up to photograph a particular scene. Only after I have taken the time to experience the scene that I am about to photograph am I able to determine how best to replicate those emotions in a photograph. Once those decisions are made, there is no question as to how to process the image upon returning home. I have already experienced it!
Even though I now use advanced digital equipment instead of film for my photography, the principle of previsualization learned years ago is still prevalent in my methods of working. When out photographing, I first pay close attention to my emotional response to the scene in front of me. If I have no emotional response, the photograph will have no power. This determines whether or not I even take the camera out of the bag. After deciding that a scene is indeed worth photographing and what emotional response I want to evoke, I can then successfully determine the correct exposure settings, lens selection, white balance, ISO, etc. are necessary to convey my message. At the same time, processing and editing methods are determined as well.
All of this takes time and effort. By slowing down and thinking, even meditating while photographing, you too can learn to create more powerful images while actually making fewer exposures.
by tmoffett | Jan 20, 2011 | Black and White, Photographic Philosophy, Ramblings
Iced Up
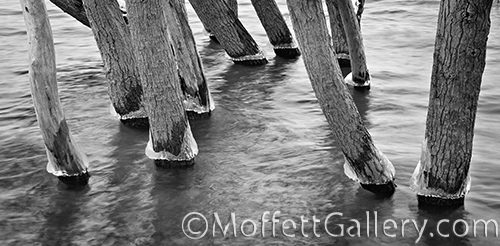
Trees and water. A landscape photographers favorite subjects. Even though many photographers shoot these subjects, they are always different. This happens due to our individual vision. I see things completely different than others and they from me. It doesn’t necessarily make one better than the other, just different. The key to creating great images is not to photograph like someone else, but to be consistent in creating images that capture your own vision. When that happens, you’ll begin to make images with feeling. Then you learn to see better. The subtleties of light and texture become not so subtle. You will see them all around you. The world becomes more beautiful as you learn to see.
This process of learning to see takes time and effort. It will not happen overnight. Study master artists. Study light. Look at the simple things in life. Photograph and analyze images. Photograph some more. As you do these things your style and vision will become evident over time. You will start to be drawn to certain subject matter and certain light qualities. Your work will mature and improve. As you evolve as an artist, listen to your heart as it will usually be right. Don’t try to be someone else, create your own style. Continue to study the masters and let their work influence you as you push your work in your own direction. Most of all, have fun.
by tmoffett | Jan 18, 2011 | Black and White, Photo tips, Ramblings
Stormy Afternoon, McCall, Idaho
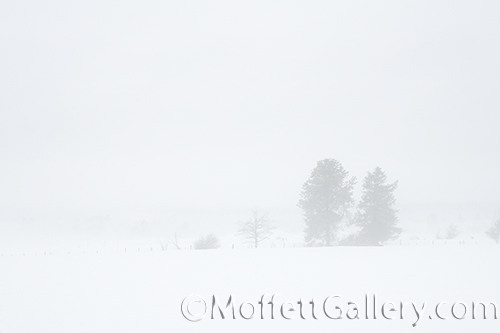
I spent the extended weekend with Christeena in McCall celebrating our 21st anniversary. This was a much needed getaway! Stress had crept into our lives and getting away from it all for a few days always seems to do the trick to help us return to a more normal life. We had a wonderful time just relaxing, driving and photographing. We had stormy weather nearly the entire time, but that has never hampered my ability to have fun and make new photographs. After attending church on Sunday, we went for a drive to check out the scenery. We headed out in a direction we had never been and were not disappointed. It was raining a bit, and then the fog rolled in. It really was beautiful. I love the fog, at least photographing in it. Driving in it is a different story. I don’t get the opportunity to photograph foggy scenes very often, so I happily took advantage of this moment.
When photographing in the fog, proper exposure is critical. If you don’t adjust your exposure settings, then your image will end up dark and muddy looking. I like the light, airy feeling of the fog, so I shift my exposure a full 2 stops. This will push the image to the light side, but should not over-expose anything. Learning to use the exposure compensation settings on your camera will make making these corrections simple.


Recent Comments