by tmoffett | Mar 23, 2012 | Color, Composition, Landscape, Photographic Philosophy

Clear Night, Arches National Park
It’s Spring Break here in Idaho, and time for another photography field trip! I’ll be photographing near Moab, Utah for the next few days and I am really looking forward to it. These kind of trips are very refreshing and help keep me fresh. It seems like a while since I have been out of my “Home Territory,” and will be a much needed break. I am a real advocate of photographing where you live, however an occasional road trip with the camera will do wonders for the revitalization of the soul.
In anticipation of this trip, I was reviewing some images made from a trip to Moab last summer. I came across this panorama that I shot at the end of the day when it was just about too dark to even focus the camera. That is one of my favorite times to shoot. It was a cloud free night and I found this horizon line to be quite interesting. It looked kind of like my lifeline, some ups and downs, maybe some bumps and bruises, yet constantly moving forward. I usually like a few good clouds, but this image, with its clean and simple design works just fine. God is the ultimate designer, and if we are observant enough, can find the beauty in whatever He places in front of us. That is the challenge. Find the beauty in the chaotic world in which we live. It is there. We must just simplify our vision in order to find it.
by tmoffett | Jan 24, 2011 | Color, Composition, Landscape, Photo tips
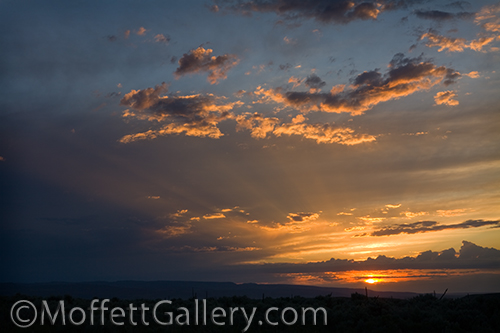
Sunset, Cassia County, Idaho
Sunsets are wonderful. Never the same, they provide so much opportunity to explore color and light. Some are subtle, filling the sky with pastels while others vibrant and deep. Nearly always, though, you will find at least some patches of blue that complement the reds and oranges that fill the sky, adding depth to an already beautiful scene.
While it seems that such incredible scenes are hard to go wrong with in photography, taking some time to carefully compose and think about the scene will greatly enhance your ability to capture it most impressively. Here are a few tips to photographing the sunset.
1. Use a tripod! This is a must for nearly any landscape photography. I use small apertures and low ISO settings to maximize depth of field and color saturation, and the result means a slow shutter speed. Hand-holding will ensure motion blur which is normally completely unacceptable.
2. Compose carefully. Using a tripod helps me to slow down and make sure that everything is near perfect. Level the horizon. Can you use the rule of thirds or is a symmetrical composition better? Check and recheck and then shoot.
3. Shoot a series of images as the sun sets. You might think you have the best image, break down and and move on only to realize that the color gets even better later. I love photographing after sunset. Often my best image is 10-20 minutes after the sun has completely disappeared over the horizon.
4. Bracket the exposure. Exposure is critical with sunsets. Over-expose and you lose saturation, under-expose and you get noise. You really need a perfect exposure in order to get a high quality print.
by tmoffett | Jan 5, 2011 | Color, Composition, Photographic Technique
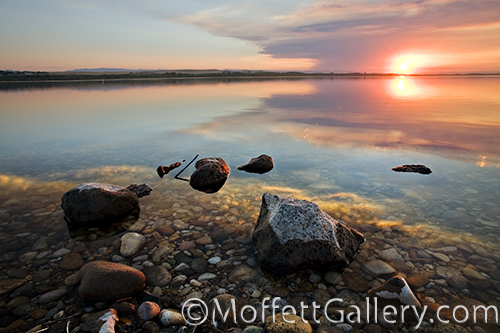
Setting Sun
One of the more difficult things for young, aspiring photographers to learn is how to see light. Light is what photography is all about, yet I find so many young students really believe that it is all about locations and subjects. Without quality light, even the most incredible subjects will become ordinary, however with quality light the ordinary subject becomes extraordinary. With every assignment that I give my students we discuss light. Over time, some finally get it, and when they do the quality and consistency of their photographs drastically improve.
This image, Setting Sun, was made practically in my own backyard. The location is less than 10 miles from home, out at the lake. I have spent many mornings and evenings here photographing. I have also viewed hundreds of photographs taken at this same location that look like mere snapshots. Harsh light, no feeling, no mood, no message. The difference is in the light and being able to capture the light in such a way as to bring out the warmth and subtle color nuances that the golden hour brings.
A good exercise to help one learn to see the light is to photograph the same subject at differing times of the day, from pre-dawn to post sunset, then evaluate the images. You will notice how the intensity, quality and color of light changes throughout the day. Knowing how light changes through the day is critical knowledge for a photographer to have. Once you understand how the light changes on a clear day, watch what it does on cloudy or overcast days. The light truly does create a mood and feeling that can transform the ordinary scene into something magnificent and beautiful.
by tmoffett | Jan 4, 2011 | Color, Composition
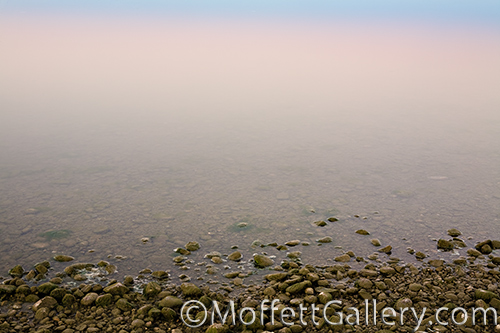
Sunrise Reflection
How often we miss the shot because we are looking for something big and grandiose instead of looking right where we are! I, too, often want to go somewhere else to photograph, but am not always able to get away. I am nearly always amazed at what I find right here in my own backyard. I have been out to the lake many, many times, but always find something new each time. The light is different, the water level changes, weather changes…
This image was made on one such occasion. I needed to get out and photograph, but had very limited time. I awoke early on a cool autumn morning and drove to the lake to watch the sunrise. I was walking the shoreline and I saw the color of the sky shift from blue to pink as the sun neared the horizon. I turned around and looked at the water and saw the reflecting colors on the surface. The image was there, right at my feet. The composition is simple and effective. The strip of blue at the top to bounce my eye back into the frame, the rocks at the bottom to frame the color. The mood and feeling is even better. When looking at a large print I feel calm yet captivated. The rocky lake bottom fades into a smooth gradation of color. What lies below the surface of color? There are questions unanswered. It keeps me coming back for another look.
by tmoffett | Dec 10, 2010 | Color, Composition, Landscape
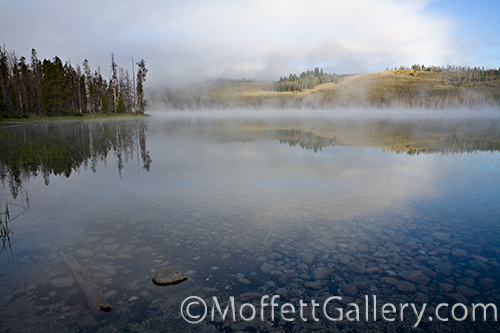
Little Redfish Lake
In landscape photography, creating a sense of depth in an image is important. While the image is rendered on a two dimensional piece of paper, it is the illusion of three dimensionality that draws a viewer in. It can help you to feel as though you are there, standing in the midst of the image. One way to help create this sense of place is to effectively use foreground, middleground and background within the frame. A dominant foreground can be created by using a wide angle lens. Once captivated by a strong foreground, middleground and background are needed to create movement and interest in the photograph. This compositional technique can be seen in the image above of Little Redfish Lake. The rocks in the foreground are luring you into the image, and then the eye moves throughout the scene to the trees on the left and the mountains peeking through the clouds further back. then back to the rocks. Creating this type of visual movement is critical to the success of a photograph.
by tmoffett | Dec 8, 2010 | Color, Composition, Photographic Technique
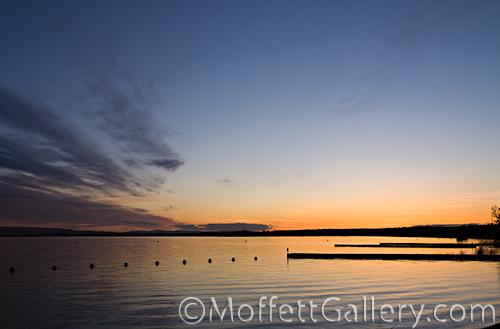
Sunset At The Docks
Color. When I was a developing young photographer (I’m still developing, just not so young anymore!), color was not an option. I carried only black and white film with me. I saw things in black and white. I thought that color only complicated matters. I was a simple photographer, therefore I simply shot black and white. Don’t get me wrong, I still love to work in black and white, but I have started to really enjoy working in color as well lately.
Color adds a whole new dimension to photographs. If not careful, it can destroy the impact of a photograph by getting in the way of the composition. It can complicate matters significantly if not used simply. On the other hand, if used correctly color can add power to an image. Photographs where color is the subject excite me! They are powerful.
I think that learning to see in black and white early on in my career has helped my color photography in the latter years. By seeing and photographing tones as opposed to hues, the image already has a strong visual foundation and adding in color then oftentimes will strengthen an already strong image. Working the other way around, seeing hue first, sometimes the image will lack in strength of tonality. At least that is how it is for me.
A great self assignment that can help in color vision is to make photographs where color is the subject. Take out the color and the image loses all impact and meaning. This can be difficult, but is a good exercise to do occasionally. I have given this assignment to one of my photo classes and am excited to see their resulting photographs in the coming days. I am hoping to be inspired to push my vision of color even farther!


Recent Comments