by tmoffett | Mar 29, 2012 | Color, Photographic Philosophy, Photographic Technique
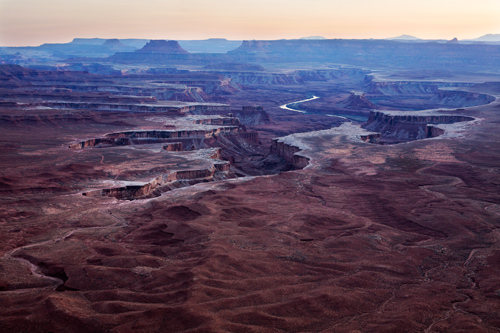
Green River Overlook
The weather in Moab, Utah has been crazy this week. Eighty degrees one day and then freezing cold and 20-30 mile per hour winds the next. The only thing we haven’t seen is storms. Some real storm clouds would be nice. I love photographing with good cloud formations in the sky. Even without the clouds, though, I have had a good time with my family and made a few good photographs as well.
We went to Canyonlands the other evening and stayed to watch the sunset. The sky was real hazy and the wind was whipping as a cold front was moving through, but it brought no real clouds. We drove through the Island in the Sky district and stopped to check out most of the access points to the rim of the canyon. We decided to go to the Green River Overlook area to see the sunset, and I am glad we did! The wind was howling, it was bitter cold and I left my coat at the hotel, there were dozens of photographers battling for prime real estate to shoot from, but the view was spectacular. I photographed until it was too dark to focus the camera and my fingers were too frozen to operate the camera anymore, then we all warmed up on the drive back to the hotel.
The image above is one that I made that night battling the wind and cold. When I got back and looked at the images, I noticed the cool undertones that most of the images had. Interesting for sunset photos, as they usually filled with predominately warm tones. It really showed me how much my own feelings influence how I photograph. I try to absorb my surroundings and make my photographic decisions based on feeling and emotion. This has become my way of working. Even when I am not thinking about it, that is often what happens. It did in Canyonlands that evening. I was working quickly and in a difficult environment, but my emotions took over. This was evident to me in the finished print. When we allow our work to become our way of life, our work becomes personal. That is what will take your work to a new level.
by tmoffett | Mar 21, 2012 | Color, Landscape, Photographic Philosophy, Photographic Technique
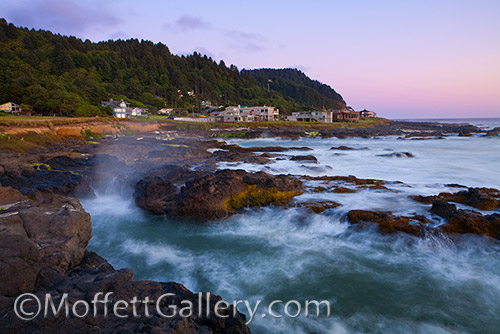
View From Ocean Drive, Yachats, OR
Photography means writing or drawing with light. Knowing this, it would then make sense that the better the light, the better the photograph. As simple as this concept may seem, it is sometimes hard to get students to understand it. So often I hear students in the process of researching other photographers work question why their own images don’t look more like the professionals. More often than not it comes down to light. You may be in a great location and have a great composition, but without great light you’ll end up with a mediocre photograph.
As the sun moves across the sky the color and quality of light that reaches the surface of the earth changes. The warm, soft light at sunrise turns to a cool and harsh light with deep shadows by mid-morning on a cloud-free summer day. By late evening the warm, soft light with rich, open shadows returns and slowly change to a soft cooler light after the sun sets. Coming to know these changes and learning to recognize what light quality will produce the mood and feeling that you want to elicit in your finished photograph are key to creating powerful images. For landscape photography, more often than not the early morning or late evening will produce the most desirable result.
There is one time of day that is often forgotten when it comes to making photographs; after the sun has set. I will often arrive at a location and watch as others are packing up and leaving and I am just getting started. A tripod is a must for making photos after sunset, but the mood and feeling rendered can be quite unlike anything that can be captured during the day. I will work many times until it is too dark to focus the camera.
The image above was taken just after sunset. You can see the warm pastel colors on the horizon, shifting to cooler tones in the upper sky. The warm light still on the horizon skims across the surface and illuminates the west face of the rocks and the buildings, while the cooler light from above illuminates the shadows and reflect off of the water. These subtle shifts in hue are what create some of the drama and interest in this image. Being patient and waiting for the right moment to press the shutter is much of what photography is about. Ansel Adams said, “Sometimes I do get to places just when God’s ready to have somebody click the shutter.” I believe that Ansel Adams had a very good understanding of light and placed himself at the right places and at the right times to take advantage of the beauty that God put in front of his lens.
by tmoffett | Mar 19, 2012 | Black and White, Landscape, Photographic Philosophy, Photographic Technique
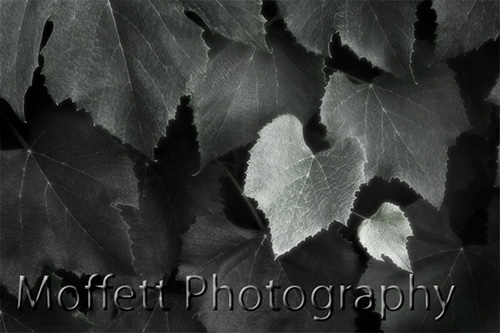
Grape Leaves
One of the most frequently asked questions by students in my classroom while working on photographs in Photoshop is, “What should I do to this image?” Nearly always my reply is the same. “What did you see and feel when you photographed it?” This concept of visualizing the end result before pressing the shutter button on the camera is becoming a lost art, yet is so important to achieving consistent, meaningful and powerful results.
I began to understand the idea of previsualization while studying Ansel Adams zone system under the tutelage of Craig Law at Utah State University. When making exposures using the zone system, a photographer must first know what he/she wants because the exposure settings (aperture and shutter speed) and film development process is determined by what the finished print is to look like. The whole process is very calculated. One must slow down and think about the image that is about to be created. Some may claim that this attention paid to the technical details takes away from the spontaneous art of photography. I differ with this way of thinking. Slowing down, really looking and taking in a scene allows me the opportunity to feel my surroundings. I am able to focus on my emotions. What is it that caught my attention in the first place? Why do I feel I need to make a photograph? What do I really see? What emotion do I want to elicit in the viewer of the image I am about to make? These are just some of the questions that I ask myself while setting up to photograph a particular scene. Only after I have taken the time to experience the scene that I am about to photograph am I able to determine how best to replicate those emotions in a photograph. Once those decisions are made, there is no question as to how to process the image upon returning home. I have already experienced it!
Even though I now use advanced digital equipment instead of film for my photography, the principle of previsualization learned years ago is still prevalent in my methods of working. When out photographing, I first pay close attention to my emotional response to the scene in front of me. If I have no emotional response, the photograph will have no power. This determines whether or not I even take the camera out of the bag. After deciding that a scene is indeed worth photographing and what emotional response I want to evoke, I can then successfully determine the correct exposure settings, lens selection, white balance, ISO, etc. are necessary to convey my message. At the same time, processing and editing methods are determined as well.
All of this takes time and effort. By slowing down and thinking, even meditating while photographing, you too can learn to create more powerful images while actually making fewer exposures.
by tmoffett | Jan 5, 2011 | Color, Composition, Photographic Technique
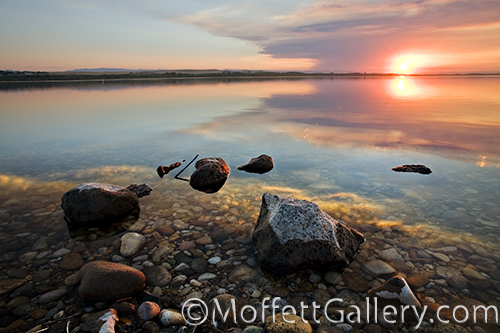
Setting Sun
One of the more difficult things for young, aspiring photographers to learn is how to see light. Light is what photography is all about, yet I find so many young students really believe that it is all about locations and subjects. Without quality light, even the most incredible subjects will become ordinary, however with quality light the ordinary subject becomes extraordinary. With every assignment that I give my students we discuss light. Over time, some finally get it, and when they do the quality and consistency of their photographs drastically improve.
This image, Setting Sun, was made practically in my own backyard. The location is less than 10 miles from home, out at the lake. I have spent many mornings and evenings here photographing. I have also viewed hundreds of photographs taken at this same location that look like mere snapshots. Harsh light, no feeling, no mood, no message. The difference is in the light and being able to capture the light in such a way as to bring out the warmth and subtle color nuances that the golden hour brings.
A good exercise to help one learn to see the light is to photograph the same subject at differing times of the day, from pre-dawn to post sunset, then evaluate the images. You will notice how the intensity, quality and color of light changes throughout the day. Knowing how light changes through the day is critical knowledge for a photographer to have. Once you understand how the light changes on a clear day, watch what it does on cloudy or overcast days. The light truly does create a mood and feeling that can transform the ordinary scene into something magnificent and beautiful.
by tmoffett | Dec 23, 2010 | Color, Landscape, Photographic Technique
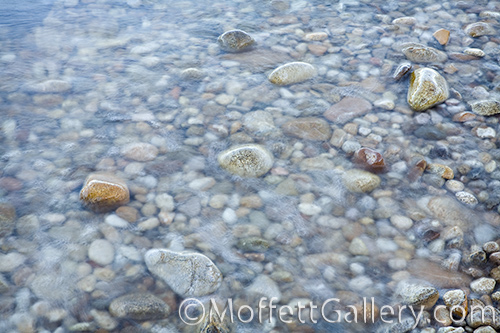
Shoreline, Gotts Point
“How do you capture the motion of water like you do?” That is a question that frequently comes up when I visit with others who are relatively young in the art of photography. It is a question that has a multitude of answers. There is one thing in common with the answers, though. It is all about shutter speed.
The shutter speed is the exposure control that determines how anything in motion is rendered in the final image. If I want to stop the motion, then a very fast shutter speed is necessary, and conversely, if I want to allow the motion to be seen in the still image, a slow shutter speed is needed. How fast or how slow? That is where experience is necessary. It all hinges on how fast the subject is moving and what effect you want portrayed. In the case of this image, with the roughly four inch waves lightly lapping against the rocks near the shore creating bubbles and foam, a .6 second shutter speed was selected so that the bubbles in motion would be evident. Any slower and they would disappear into a blur of motion. Any faster and they appear to be standing still. As is, the lines and streaks are what creates the interest in the image. Take a look at the detail image below.

Detail of Shoreline, Gotts Point
Using shutter speed to control motion in photography is something that can only be learned through experience. I have shot thousands of images and analyzed them to get where I am today, and I am still learning and refining my craft. I have learned that motion in a photograph can be used to create mood and feeling. What that mood or feeling is depends on the amount of motion exhibited. The amount of motion shown is completely determined by what shutter speed is selected.
Take control of your image making by taking your camera off of Auto or Program mode, switch to Manual Mode and have fun! Don’t get discouraged by a few mistakes, but analyze them and learn from them. In a short time you will see major improvements in your ability to create more personal meaningful photographs through the use of motion.
by tmoffett | Dec 9, 2010 | Landscape, Photographic Technique, Photoshop tips

John Day Fossil Beds, Painted Hills
On our way back to Idaho from the Oregon Coast last summer, we stopped at the John Day Fossil Beds Painted Hills Unit. We had never been there before, and thought it might be a good rest stop. We arrived about an hour and a half before sunset, just as the light was starting to get good. We were not disappointed in what we saw. It was the perfect place to shoot panoramics. Up to this point, I really had not done much as far as shooting multiple images and stitching them together into a panoramic view. I decided to try that technique here. The image above is created from nine individual images stitched together in Photoshop. While I don’t use this technique very often, it is useful in some situations and is fun to try occasionally.
While Photoshop makes it quite easy to stitch images together, there are a few things to keep in mind to in order to get better results. First, anything in motion will make it more of a challenge. This applies to clouds, water or even foliage that is blowing in the wind. Second, the foreground is easily distorted, so be careful what you place there. Third, While Photoshop does a fairly good job of stitching the images together, carefully check and double check the seams! Some cleanup with the clone stamp or healing brush is nearly always necessary. Paying attention to these three point will greatly improve your results.


Recent Comments