by tmoffett | Oct 1, 2010 | Color, Landscape, Photo tips
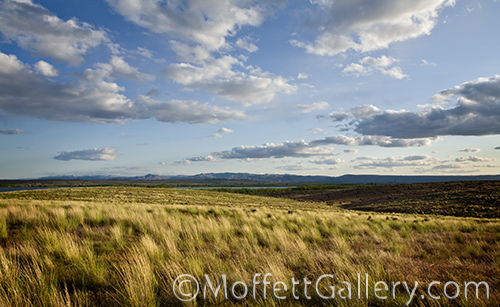
Blowing Brush
I just gave my Photo 2 class an assignment to capture motion in a photograph. We discussed how to show movement and motion and how to stop the motion. We talked about shutter speeds and equivalent exposure. I hope they understood. I will find out over the next few days how well I taught the concept. Most of what we discussed revolved around sports photography, as the need to stop the action is great. As I thought about it, though, I realized that in landscape photography I make decisions relating to motion on a daily basis.
Wind is a very big part of nature. There are many times that I want to show the power of the wind. As the leaves blow, I see the power and beauty of the wind. Properly photographed a scene can come alive. With the wrong settings, a scene can be killed. Understanding your camera and its settings can make or break you in the wind. A slow shutter speed allows the motion to be seen in an image. Set it too slow, though, and it turns to mush. Practice is the only way I know to learn how to capture the wind.
by tmoffett | Sep 29, 2010 | Color, Composition, Landscape, Photo tips
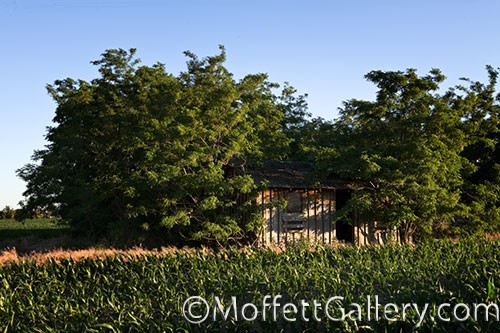
Abandoned, Canyon County, Idaho
Photography means writing with light. If we are going to have quality “writing” we must have quality light. I have had students ask “Why can’t I make photographs like yours?” I nearly always answer with, “You can” followed up with “What time of day did you shoot that one?” I already knew the answer, but needed to ask in order to make the point.
The quality of light changes throughout the day. On a clear day, the warmest and softest light is in the evening, just before the sun sets. Mornings at sunrise are good too. I love working in the evening, as I can watch the light get better and better right through the sunset, and then it changes to a cooler, but still a very soft, moody light. The soft, directional light that happens that last hour before sunset is very sweet. The texture in nature becomes very pronounced. The shadows are deep, yet not blocked up. The warm/cool relationship between highlights and shadows is also more pronounced. It makes for amazing images. Don’t get me wrong, you must still have a vision. The photograph doesn’t create itself, but when vision and light work together you can get some terrific results.
If we want to create images with feeling and power, we must be willing to work when the light is right, even if it is not convenient.
by tmoffett | Sep 27, 2010 | Black and White, Landscape, Photo tips
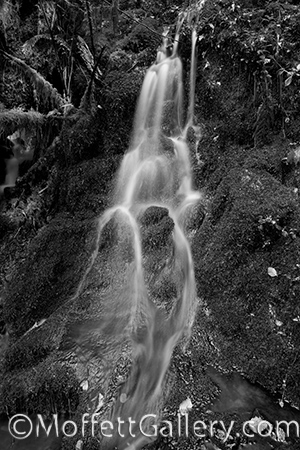
Transparent Falls
One of the most frequent questions I am asked is, “How do you photograph water to make it look like that?”
The answer is quite simple if you understand how a camera works. I use a tripod and long shutter speeds. How long of shutter speed? That depends on how much water is flowing and how smooth do you want it to look. That is the part that takes experience and vision. If you don’t know what you want it to look like, then it really doesn’t matter, but if you know, then you must practice and practice and practice. That is the concept that I find difficult to teach. Many students just want me to tell them what and how to shoot, but I don’t operate that way. I want my students to learn to make good decisions so that when I am not around to answer them, they can come up with their own decisions.
I am currently teaching a unit on basic exposure, apertures and shutter speeds. I am finding that the students who take the time to go out and photograph catch on quickly and those that don’t struggle. It is that simple. Practice and you’ll get it, but don’t and you won’t.
by tmoffett | Sep 23, 2010 | Black and White, Composition, Landscape, Photo tips
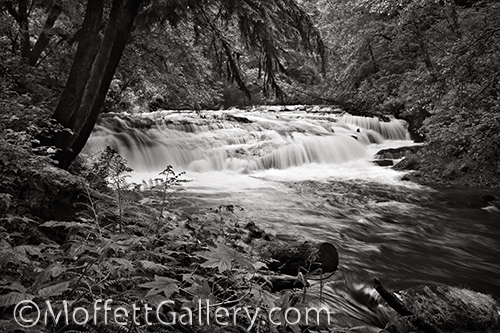
Knowles Creek
One of the most beautiful small rivers I have visited is Knowles Creek in western Oregon. One summer afternoon Christeena and I took a small hike along its banks, and along one section we walked there was nearly a mile of nonstop, staircase type waterfalls. There was nearly too much water to get nice photographs. When it comes to shooting waterfalls, I prefer just a little water as it tends to photograph better than a whole lot of water. When there is too much flow, the water just turns to a white, textureless streak. With less water a soft, ribbon like effect happens. It is much more interesting that way. You can almost feel the flow of the water.
There is just something about kicking back and relaxing on the banks of a river. The sound of the running water and the fresh air of the outdoors is so peaceful and nice. Even the occasional rainfall that came down didn’t disrupt the feeling in the air. I could hang out in the outdoors year round without a problem. It is my kind of life. Just me, my family and my camera. Wouldn’t that be nice!
by tmoffett | Sep 19, 2010 | Color, Composition, Landscape, Photo tips
Framed by the light
When it comes to photographic composition, there is no rule greater than the Rule of Thirds. This rule of composition is not new. It stems from the Fibonacci Theory, also known as the Golden Mean, the Golden Ratio or the Fibonacci Spiral. It is a pattern in nature in which a spiral galaxy is laid out, the arc a hawk takes when diving at its prey and even a sunflower seed follows this patten when it grows. It is a pattern that we see everyday in nature, therefore it only makes sense that because we subconsciously are aware of it, our photographic compositions will be stronger if we apply this theory to them.
In a nutshell, the Rule of Thirds is a lazy mans Fibonacci Curve. It is not exact, but close. I think if we are aware of this theory and then compose our images from the heart, not from a grid, more often than not the image will line up with the Fibonacci curve. What the rule of thirds states is that if we divide the frame into thirds, both horizontally and vertically, the intersecting points are the strongest points in the composition. Our subject should then be placed at on of those points. The following is an illustration of the Rule of Thirds.
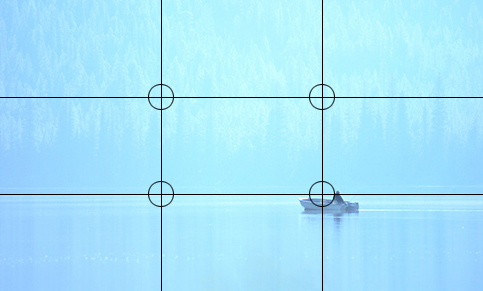
The intersecting points onthe grid are the strongest points to place the main subject.
This is the first theory that I discuss with my classes in their composition unit, as it can be applied to almost any photographic situation. This is the rule that we build on to make even better photographs throughout the year. As we apply line, framing and other compositional rules and concepts of design in our photography, we can still use the rule of thirds along with them to make our photographs even stronger.
by tmoffett | Sep 17, 2010 | Color, Landscape, Photo tips
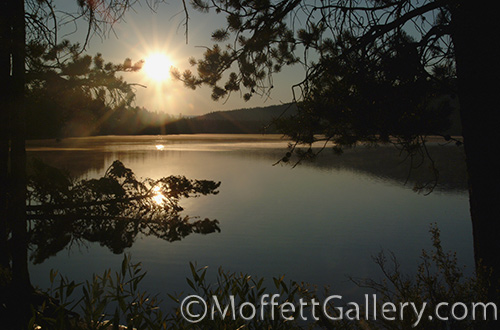
Stanley Lake Sunrise
I have been told numerous times that you can’t shoot into the sun. I remember many a time at a wedding that someone would approach me while I am photographing the bride and groom and mention that the sun is at their backs. “Your pictures won’t turn out,” they say. Annoying. Yes. But I would always just respond with, “Trust me. They are doing just fine!” Then when they see the results they are amazed.
I love landscape photographs with a monochromatic color scheme, and backlighting is one way to achieve that, as you can see from this image. I like to get up before sunrise and shoot the first hour of light. With the low sun, I can get lots of images with this wonderful light quality. It is dramatic and moody, yet still low enough contrast to maintain detail where I want it. this is something that is not possible at mid-day. Early morning and late evening. The perfect light.


Recent Comments